After failing to find a suitable rack to hold my planned MH pendant, I decided to go the DIY route. Found some inspiration from the forums on the internet and decided to go for aluminum structure for strength and aesthetic. I was mentally prepared to do some drilling, cutting and riveting. So today I went down to:
Teck Cheong Aluminium Pte. Ltd. Address is Blk 803 King George's Ave #01-246/248/250.Tel: 62949650 / 62989936. (not to advertise for them but to prevent my PM from being flooded!;) )
To my pleasant surprise, I discovered a very customizable and easy system that takes away all the mess of drilling or riveting. You only need Allen keys to tighten the structure. These are the stuff I bought:
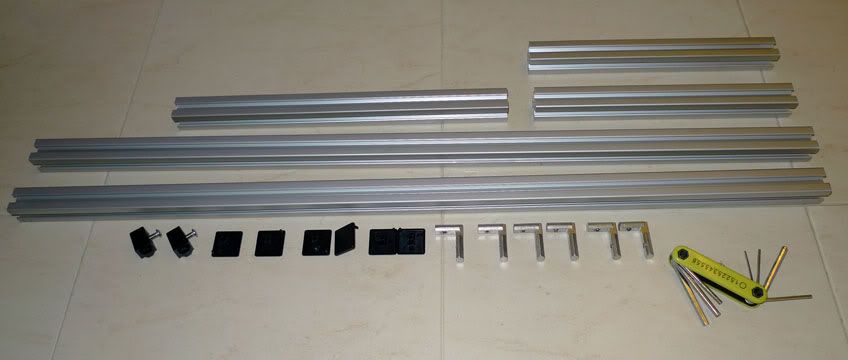
You have to buy the aluminum bars at 5 metres length (~$40+) but they are willing to cut to lengths for you. They have external and internal brackets (I went for the internal brackets~ neater), plastic end covers, a lot of other customizable add-ons to suit your needs.
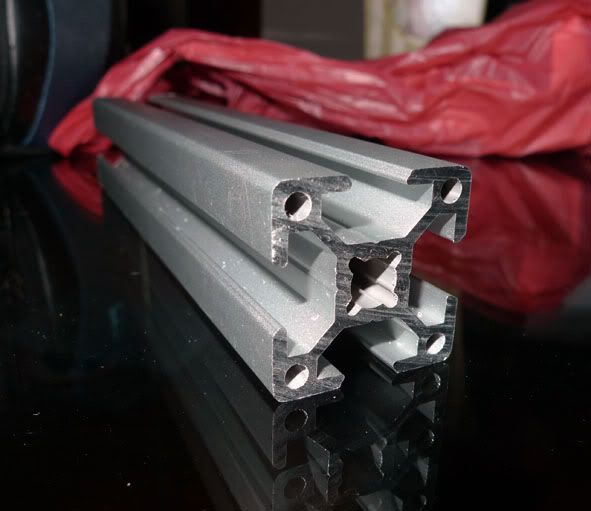 A close up shot of the cross-section to illustrate my point about the structural strength compared to the usual hollow aluminum trunking used in other DIY.
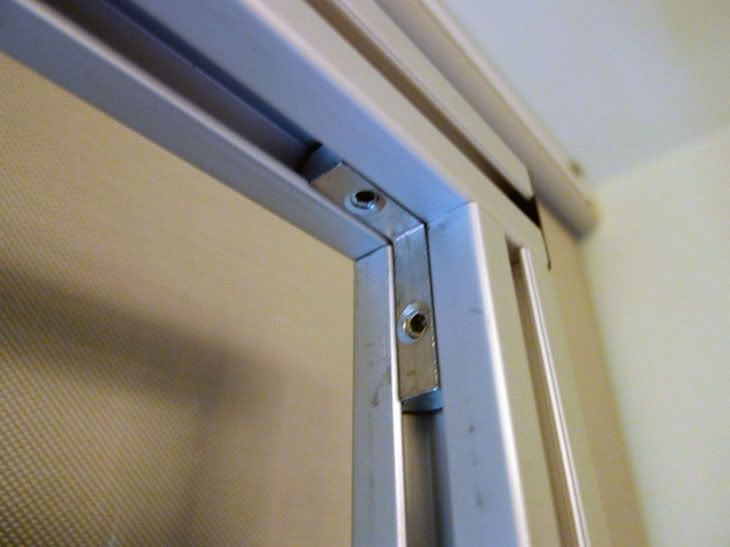 A close up shot of the internal brackets (L-joints)
The bars are very strong with a solid core (different from the aluminum trunking that most DIY racks uses) and thus weight down the whole structure giving it some resistance to wind/gust..the internal brackets (L-joints) are cast iron..so pretty sturdy as well... the only problem I may have is the narrow base relative to the tall height...a quick hand pushing and pulling test shows that it's pretty steady as well.
The finished product over my new glass terrarium.
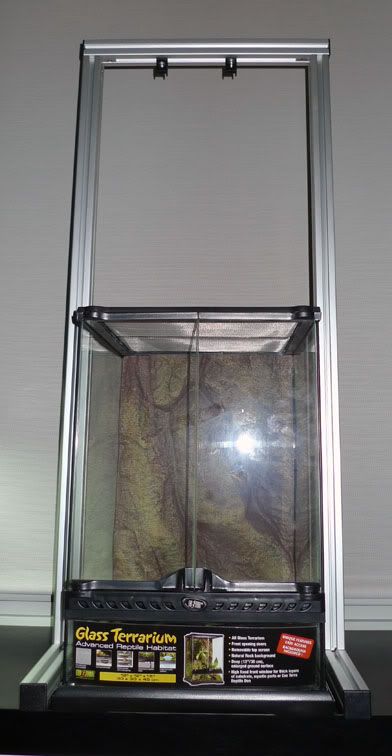 I gave the rack another 1.5 feet above my 1.5 feet tank to make sure I have enough head room to mount the MH light set higher. This will allow me to adjust the spread of the light via the hanging set as well as move the MH set higher to reduce the heat reaching the paludarium.
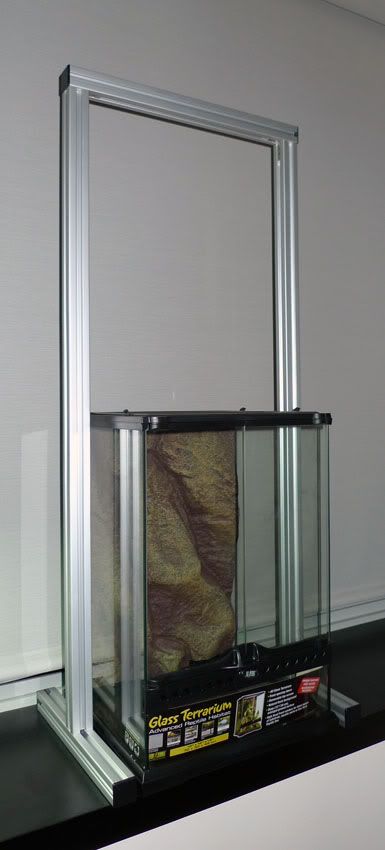 I like the neat, customizable and fuss free construction and with the end result that exceeds my expectation of a stable and sleek rack.
Hope the above will provide some ideas and option for people who are keen to DIY.
No comments:
Post a Comment